
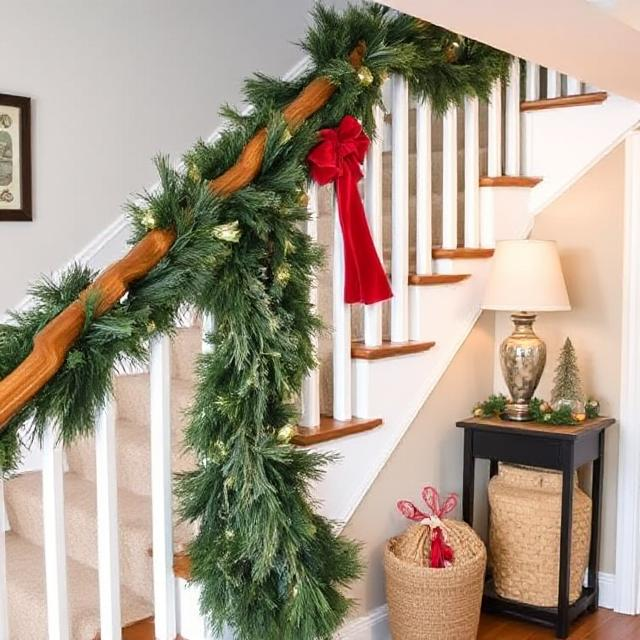
To put garland on stairs, start by selecting a garland that complements your decor and is long enough to cover the railing from top to bottom. Begin at the top of the staircase, securing the garland to the railing with floral wire and zip ties. Drape the garland along the railing, allowing it to flow naturally with swags for a festive look, and secure it at intervals (every 12-18 inches) to keep it stable.
For added elegance, weave in string lights and ornaments to enhance the garland’s visual appeal, creating a warm and festive ambiance while ensuring the garland doesn’t obstruct the handrail to maintain safety and functionality. At the bottom of the staircase, trim any excess garland and secure the end neatly to achieve a polished finish.
If your staircase features a banister, consider adding garland to both sides to create a symmetrical and balanced appearance that elevates the overall aesthetic. Throughout the process, use durable materials like floral wire or zip ties to secure the garland at regular intervals, ensuring it stays in place without damaging the railing.
Once the setup is complete, test its stability by gently tugging on the garland to confirm it’s secure and safe for use, allowing you to enjoy a beautifully decorated staircase that combines style and practicality.
Why Decorate Your Stairs with Garland?
Decorating your stairs with garland elevates your home’s aesthetic, creating a festive and welcoming atmosphere while tying together your holiday decor. Garland enhances visual appeal, offers a canvas for personalization with lights and ornaments, and ensures a cohesive flow throughout your space. To install, start at the top, securing the garland to the railing with floral wire or zip ties, and draping it naturally, adding swags for elegance.
Weave in lights or ornaments for extra charm, ensuring the handrail remains unobstructed for safety. Trim excess garland at the bottom and secure it neatly, or add garland to both sides of a banister for balance. Test the setup for stability, creating a stunning yet practical staircase centerpiece.
Choosing the Right Garland for Your Stairs
Choosing the right type is important before you start hanging garlands on your banister. Here are some popular options:
Artificial Garland
Artificial garland is durable, reusable, and available in various styles, from traditional pine to luxurious magnolia leaf designs. It’s also low-maintenance and doesn’t shed like real greenery.
Real Greenery
For a natural, fragrant option, consider a real garland made from cedar, spruce, or pine. However, real greenery requires more care and may dry out over time.
Pre-Lit Garland
If you want to save time, a pre-lit garland with built-in twinkle lights is a great choice. It eliminates the need to string lights separately and ensures even lighting.
Tools and Materials You’ll Need
To hang garland on stairs like a pro, gather these essentials:
- Measure your staircase to determine the length needed
- Floral wire or zip ties
- Command hooks or adhesive clips
- Decorative accents
- Scissors or wire cutters
Step-by-Step Guide to Hanging Garland on Stairs
Follow these simple steps to achieve a polished, professional look:
Step 1: Measure Your Staircase
Start by measuring the length of your staircase banister. Add a few extra feet to account for swoops and swags. For a fuller look, consider layering two garlands.
Step 2: Prep the Garland
If you use artificial garland, fluff it to separate the branches and create volume. For real greenery, trim any uneven ends and mist it with water to keep it fresh.
Step 3: Attach the Garland
- Using Command Hooks: Place hooks evenly along the banister. Secure the garland by looping floral wire or zip ties around the hooks and garland.
- Using Floral Wire: Wrap the wire around the banister and garland regularly to keep it in place.
- Using Ribbon: For a decorative touch, tie the garland to the banister with a festive ribbon.
Step 4: Create Swoops and Swags
To add visual interest, create gentle swoops in the garland. Allow it to dip slightly between attachment points for a cascading effect.
Step 5: Add Decorative Accents
Enhance your garland with:

- Ribbon: Weave it through the garland or tie bows at intervals.
- Lights: Wrap battery-powered fairy lights around the garland for a magical glow.
- Ornaments: Hang small ornaments or berry picks for pops of color.
Step 6: Secure Loose Ends
Tuck any loose wires or ends out of sight. Ensure the garland is firmly attached to prevent slipping.
Decoration Themes for Staircase Garland
1. Classic Christmas
- Red and gold ribbon
- Pine garland with warm white lights
- Traditional ornaments and berries
2. Rustic Charm
- Burlap ribbon
- Pinecones and dried orange slices
- Natural greenery with wooden accents
3. Modern Minimalist
- Simple eucalyptus garland
- White LED fairy lights
- Matte black or silver ribbon
4. Winter Wonderland
- White frosted garland
- Blue and silver ornaments
- Cool-toned LED lights
Safety and Practical Tips
Fire Safety: If using real garland, keep it away from open flames and check the lights for overheating.
Pet-Friendly Options: Avoid toxic plants like holly and mistletoe if you have pets.
Secure Properly: Ensure the garland doesn’t obstruct the handrail or create a tripping hazard.
FAQs
1. What’s the best way to attach garland to a stair railing without nails?
Use Command hooks, floral wire, or adhesive clips for a damage-free installation.
2. How do I keep garland from slipping on stairs?
Secure it tightly with zip ties or floral wire, and avoid overloading it with heavy decorations.
3. Should I use real or artificial garland for the staircase decoration?
Artificial garland is more durable and low-maintenance, while real greenery offers a natural fragrance and look.
4. How long should my garland be for stairs?
Measure your banister and add extra length for swoops. For a standard staircase, 20-30 feet is usually sufficient.
5. Can I reuse the garland next year?
Yes, artificial garland is reusable if stored properly in a cool, dry place.
Conclusion:
Learning to put garland on stairs doesn’t have to be complicated. You can transform your Floating Glass Stairs into a stunning holiday centerpiece with the right tools, techniques, and creativity.
Whether you’re a beginner or a seasoned decorator, these tips will help you achieve a professional look that wows your guests and spreads holiday cheer. So grab your garland, gather your supplies, and get ready to descend those stairs!